Friday, September 30, 2011

{ DIY Pallet Bench}

{DIY Pallet Bench}
You will need:
Pallets
A hand Saw
A strong man ;) 
Get your strong man to use the hand saw to cut the Pallets in half.   :) 
{That is the width we needed to the space we were filling.} 
Stack the Pallets on top of one another & top with comfy cushions! & That's it! 
We will probably go back & sand the edges of the pallets so that no one gets splinters. 
We will put the firepit area to good use very soon! It's definitely s'more season now :)  
Happy Friday!

Thursday, September 29, 2011

{27 weeks}

{27 weeks}
I'm actually starting to look pregnant & i'm Loving it :) {Although, i am running out of clothes to wear...} Giuliana moves around quite a bit now, which is why we got concerned last week when i wasnt able to feel her move for a couple of days. So, we went into the hospital & got evaluated. They found her little heartbeat after a lot of searching. Our little girl is A-ok, she was just hiding :)
 I love singing to her & rubbing my belly. The song "The only Exception" by paramore has been stuck in my head for weeks now. I'm always singing it or humming it. She likes it a lot :) Hope thats not a bad thing.. 
Seriously, i'm addicted to this song. I play it over & over. & if i'm not listening to it, im singing it.
Whenever we play music or sing, Giuliana jumps around like crazy! I think she is just as eager to meet us  as we are to meet her.
13 weeks left!

Wednesday, September 28, 2011

{Soaking Whole grains & Kefir}

Have you ever thought about soaking your whole grains before? I had heard about the importance of it, but never tried it. Soaking our whole grains, beans, & flour is something i would like to try & continue to do for our family, because of the many health benefits. & I figured, since i will be home with our kids, i will actually have time to do it! 
{Image found here}
From what i understand, to soak your whole grains, you need to soak them with Warm water & an acid medium such as Kefir, Cultured Buttermilk, Cultured yogurt, Apple cider Vinegar, Lemon juice, or whey. The acid medium is supposed to soak off the Phytic acid layer on the grain, which is the hardest part to digest. Soaking off this layer will make your grains much easier to digest. 
To read more about the health benefits of grain soaking, Click Here. I found this site to be very helpful.

On the topic of Acid mediums, Kefir is one that i am very interested in. I have been wanting to try & make it for a long time. The reason? It too has many health benefits for you & your family.
{Image from Google}
I'm not anywhere near being a pro on this topic, so to  Read more information about Kefir, click  Here. 

These are a couple of things I would like to try to incorporate into our everyday lives to keep our family healthy & happy. If you have any insight or helpful hints, Please leave a comment! 

Happy Wednesday!

Monday, September 26, 2011

{#26}

Remember our List of things to do before baby? Well, we are always working on our little projects. This week, we decided to work on #26: A mantle for our front living room.

We have always wanted to have a fire place in our home, mainly becuase we wanted a mantle. You know, so we can decorate it, & hang christmas stockings on it & stuff. Fake fireplaces arent all that appealing though, so we decided a while back that we would just make a mantle on the wall behind our couch. Wall mantles can get pretty expensive though... so we thought we would be creative & make our own unique mantle.
We went to our families farm & dug around in the junk piles & found this really cool piece of old wood! We took it home & cleaned it off really well. {No more bird poo! yay!} Then we got some wall brackets from a local Rod iron store & put it up just like a shelf! It's our unique wall mantle that only cost $20 :) 
I am very excited to decorate it for thanksgiving & Christmas!  
#26: A mantle for our front living room 
Thank you Husband for your hard work :) 

Happy Monday Everyone! 

Friday, September 23, 2011

{Soy nut butter cookies}


My whole life i have had a severe peanut allergy, along with many other allergies. I was that kid that had to carry an Epi pen in my backpack, just incase i came in contact with peanuts, because my body would go into anaphylactic shock, not very fun. We always had a goofy "Peanut free zone" sign on our class room, all because of me. & im pretty sure i had a pin that looked almost identical to the one pictured on the top of this post. So embarassing.  As i have grown up though, all of my other allergies kind of dissapeared! The only one that has stuck around is this peanut allergy. Being allergic to peanuts can be kind of difficult sometimes, especially when everyone is talking about how yummy a certain food or treat is that contains peanut butter. I dont think of yummy when i think of peanut butter or peanuts, i think, "oh my gosh im gonna die". Over the years i have used different substitutes for peanut butter, and my favorite, by far, is Soy nut butter. My husband even likes it. He says it tastes almost identical to the real thing! For all you people out there with peanut allergies, or anyone that just wants a yummy recipe, here is a great peanut free cookie recipe! Enjoy!

{Soy Nut Butter Cookies}
You will need:
1/2 C Shortening or butter
3/4 C Soy nut butter
1/3 C Sugar
1/3 C Brown Sugar
1 egg
2 T milk
1 t vanilla extract
1 1/2 C flour
 1 t baking soda
1/2 t salt
Big choc chips

1. In bowl, place your Shortening & Soy butter. 
2. Mix on Medium speed until it looks like this ^. Nice & fluffy :) 
3. add 1/3 C Sugar & 1/3 C Brown sugar & mix again until well blended.
4. Add 1 egg, 2T Milk, & 1 t vanilla to mixture. Beat well.
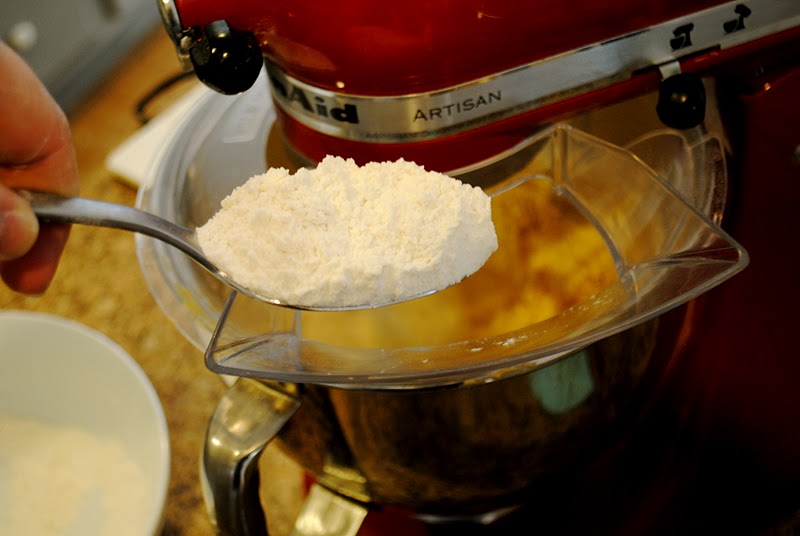
5. While your mixture is blending, in a Seperate bowl, mix together 1 1/2 C flour, 1 t baking soda, & 1/2 t salt.
6. slowely add your dry mixture to your main mix, as it is still mixxing on low speed. Mix until well blended.
It should look something like this once it is done. 
7. In a small bowl, pour a good amount of sugar.
8. Using a cookie scoop, begin scooping out the dough..
9. Form each ball of dough into a 1 inch ball
10. Continue scooping and rolling dough balls until all the dough is gone.
11. one by one, place your dough balls into the bowl of sugar..
12. Roll them around until they are completely covered in sugar.
13. Place them on an ungreased cookie sheet.
14. Continue this until you have a full pan.
15. Place cookies in the oven & bake @ 375 for 8-10 minutes
When you take them out of the oven, they will look like This! All crackly on the top. Yum! 
If you would like to, place a big choc chip on the top of each cookie & press down. This is optional. The cookies are yummy both ways! We left some plain & added Choc Chips to others. Delicious! 
My husband told me that these cookies taste just like the peanut butter version, so thats a plus! 
This is the brand of Soy nut butter we use. We have been able to find it at most grocery stores in our area. It is delicious :) I am glad we found it! I put it on toast almost every morning! Yum! 

Well, Happy Friday everyone! 

Thursday, September 22, 2011

{The best 5 years of my life}

This last Saturday, William & i celebrated our 5 year anniversary. 
I know i know, some of you are very confused now, so let me explain. 
We have only been married for 2 1/2 years, but our journey together started 5 years ago, on September 17th on a student counsel trip. We were both Juniors in Highschool :) 3 weeks after we started dating, William asked me to marry him, & just over 2 years later, we actually got married. Our story is a pretty good one, {& long one} that i am proud to tell our children one day. But long story short, these past 5 years have been so wonderful & i am so thankful for every moment that we have shared together. Being 20 years old, this means i have already spent 1/4 of my life with my sweet heart :) This makes me so happy. Here are some random pictures from the past 5 years, leading up to our wedding {Wish i could find more!!} {Some are bad quality because we took a picture of a picture...}


I love you William :) 


Wednesday, September 21, 2011

{26 weeks & A crib for baby!}

It has been quite a while since our last post! but A lot has gone on these last couple of weeks. 
 William & I have been working on so many projects! 
The biggest one that we are super excited about is our new crib :) 
Late the other night, we stayed up & built the crib together. 
{William did most of the work though, ill admit it :)  } 
It turned out beautiful! Even in our messy nursery it looks amazing :) Now Giuliana will have a place to sleep once we get her home! 
& speaking of Giuliana, She is growing nice & big! 
Here we are at 26 weeks! 6 1/2 months already! I can't believe it . We only have about 14 weeks to go until we get to meet our sweet little girl! We can hardly wait :) 


Happy Wednesday :)